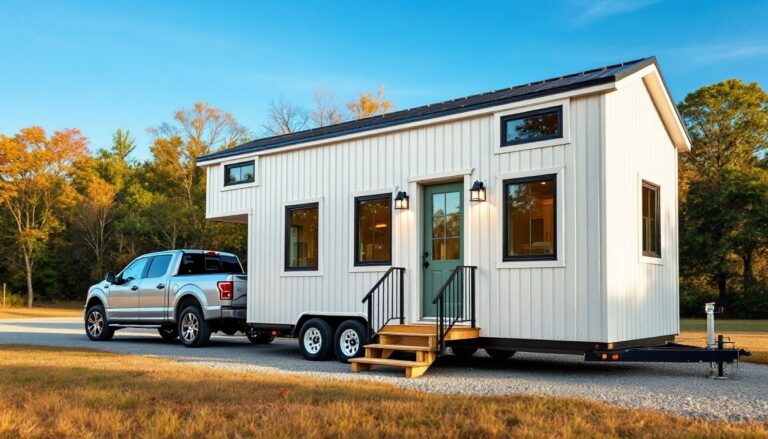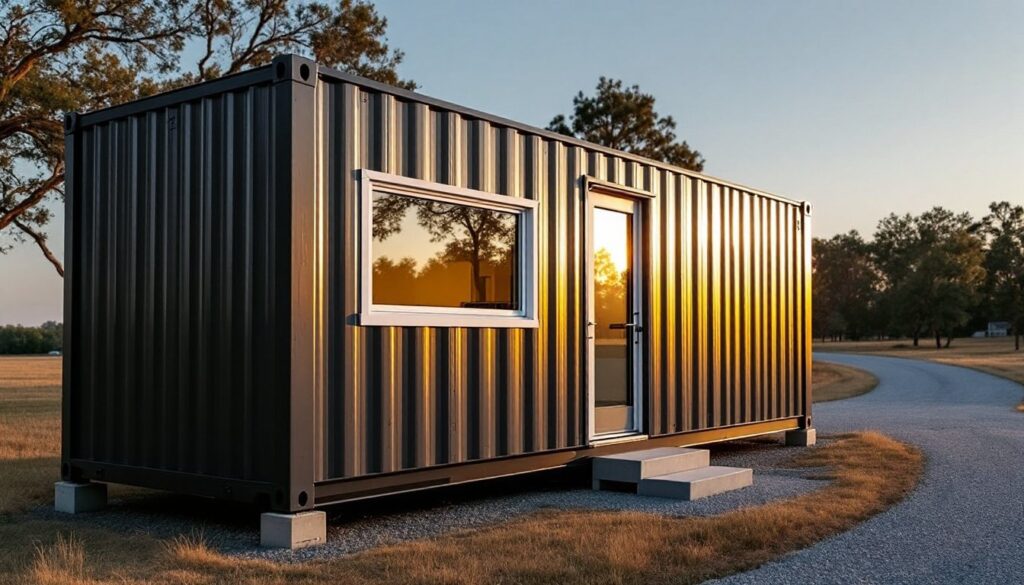

Shipping containers aren’t just for cargo ships anymore. These steel boxes are becoming one of the smartest ways to build affordable, durable tiny homes, especially as lumber prices stay volatile and housing costs continue climbing. A single 20-foot container can become a fully functional living space for under $30,000 if you’re willing to do some of the work yourself, or around $60,000–$80,000 for a turnkey build. Container homes offer structural strength, modularity, and a faster build timeline than stick-frame construction. But they also come with unique challenges: zoning hurdles, insulation demands, and the need for serious cutting and welding. This guide walks through what it actually takes to turn a shipping container into a livable tiny house, from picking the right box to budgeting your build.
Table of Contents
ToggleKey Takeaways
- A shipping container tiny house can be completed in 3–6 months and cost $13,400–$30,200 for a DIY build or $60,000–$80,000 for a turnkey project, making it an affordable alternative to traditional housing.
- Shipping containers provide inherent structural strength, standardized dimensions, and sustainability benefits, but require professional surface prep, welding, and insulation to handle condensation and climate control.
- Choose container types based on budget: one-trip containers ($4,000–$6,500) are near-new, while wind-and-watertight options ($1,500–$2,500) work for cost-conscious builders, but always verify cargo history and avoid corner posts during modifications.
- Closed-cell spray foam insulation (2–3 inches) is essential for preventing condensation in metal boxes and should be paired with a mini-split heat pump system for efficient climate control in spaces under 400 square feet.
- Plan your layout carefully around the tight 7’8″ internal width, position plumbing along one long wall, and ensure legal egress windows (5.7 sq ft minimum) in sleeping areas to meet building codes.
- Verify local zoning regulations and permitting requirements before purchasing a container, as costs can range from under $500 in rural areas to $2,000–$5,000 in urban jurisdictions requiring engineered plans and energy code compliance.
Why Shipping Containers Make Perfect Tiny Homes
Shipping containers are built to handle cross-ocean voyages, stacked nine high, in saltwater spray. That means they’re already engineered to bear significant loads, about 67,200 pounds on the four corner posts of a standard 40-foot container. This inherent strength translates into a robust shell that can support roof loads, snow, and modifications without requiring additional framing in most cases.
They’re also standardized. A 20-foot container measures 19’4″ long (external), 8′ wide, and 8’6″ tall. A 40-foot container is 40′ × 8′ × 8’6″. That predictability makes planning, permitting, and transport easier than custom-built structures. You know the dimensions before you buy.
From a sustainability angle, reusing a retired container keeps steel out of the scrap yard. Containers are typically retired after 10–15 years of shipping service, and millions sit unused globally. That said, not all containers are created equal, many have been exposed to harsh chemicals during cargo transport, so surface prep and cleaning are non-negotiable.
Finally, speed matters. A container tiny house can go from delivery to move-in in as little as 3–6 months, depending on complexity and whether you’re DIYing or hiring pros. Compare that to 8–12 months for conventional home construction. You’ll still need a foundation, utilities, permits, and inspections, but the shell is already there.
Choosing the Right Shipping Container for Your Tiny House
Start by deciding between one-trip, cargo-worthy, or wind-and-watertight (WWT) containers. One-trip containers have made a single voyage from the factory and are in near-new condition, expect to pay $4,000–$6,500 for a 20-footer. Cargo-worthy containers are certified for shipping and in good structural shape, typically $2,500–$4,000. WWT containers are older and may have surface rust or dents but are still sealed and weatherproof, running $1,500–$2,500.
Avoid containers with heavy rust, large dents in the corner posts, or holes in the floor. Check the CSC plate (Convention for Safe Containers) for the build date and last inspection. Containers older than 15 years may have unseen frame damage.
If the container previously carried hazardous cargo (pesticides, chemicals), you’ll need professional abrasive blasting and repainting. Ask the seller for a cargo history. Most reputable dealers can provide it.
Container Sizes and Configurations
20-foot containers offer about 160 square feet of interior space (after insulation). They’re ideal for solo dwellers or couples willing to go minimalist. Interior height after insulation and flooring is around 7’8″, tight but workable.
40-foot containers double your footprint to roughly 320 square feet. These work well for small families or if you want distinct zones, bedroom, kitchen, living area. High-cube containers add an extra foot of height (9’6″ exterior), giving you 8’8″ of interior clearance after buildout, which feels significantly more open.
You can also join multiple containers. An L-shape or side-by-side configuration creates courtyards, covered decks, or multi-room layouts. Cutting and welding containers together requires a structural engineer’s sign-off in most jurisdictions and adds $5,000–$15,000 to the budget, but it’s worth it if you need more than 320 square feet. Projects using multi-container layouts have become popular in urban infill and rural settings alike.
Planning Your Shipping Container Tiny House Layout
Before you cut a single opening, draw your layout to scale. Containers are narrow, just 7’8″ internal width after you add 2″ of spray foam to each wall. That means furniture placement and circulation paths need precision.
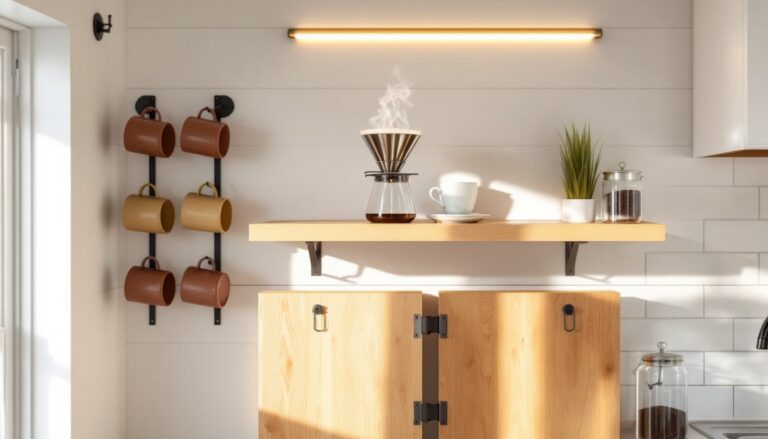
Place your kitchen and bathroom along one long wall to consolidate plumbing runs. A galley kitchen (24″–30″ deep counters on one side) is the most space-efficient layout. Use the opposite wall for storage, a fold-down table, or a murphy bed.
Bathrooms in container homes typically run 5′ × 4′ minimum. Go smaller and you’ll struggle to fit a standard 60″ tub or 36″ shower pan. A corner shower stall (32″ × 32″) and a composting or macerating toilet save space and simplify plumbing, especially if you’re off-grid.
Window and door placement matters structurally. Cutting openings in the corrugated sidewalls weakens the container unless you reinforce with steel framing around each opening, typically 2″ × 2″ or 3″ × 3″ square tubing welded in place. Don’t cut the corner posts. Ever. They carry the entire load.
Plan for ceiling height. After adding 2″–3″ spray foam to the ceiling and a 3/4″ plywood subfloor with underlayment, you’re left with about 7’6″–7’8″ of headroom in a standard container. That’s livable but tight for anyone over 6’2″. High-cube containers are worth the extra $500–$800 if ceiling height is a concern.
Many builders install a raised sleeping loft at one end to free up floor space below. A loft sleeping platform at 4′ height leaves enough clearance to sit up in bed and creates room for a closet, desk, or seating below. Access via a ladder or space-saver stairs (alternating tread or ship’s ladder style).
Don’t forget egress. Most jurisdictions require at least one egress window per sleeping area, minimum 5.7 square feet of opening, 24″ tall, 20″ wide, with a sill no higher than 44″ above the floor (per IRC). That’s a legal requirement, not a suggestion.
Essential Modifications and Construction Steps
Start with surface prep. Strip any existing paint if it’s chipped or unknown. Use a needle scaler or wire wheel to remove rust. Prime all bare steel with a rust-inhibiting primer (e.g., Rust-Oleum 769) before any other work. This prevents corrosion from the inside out.
Next, cut your openings. Mark door and window locations, then use a 4.5″ or 9″ angle grinder with a metal cutoff wheel, or hire a mobile welding service to do plasma cutting. Each opening needs a welded steel frame. Weld 2″ × 2″ or 3″ × 3″ steel tubing around the perimeter of every cut. This is not optional, it maintains the container’s structural integrity.
Install windows and doors. RV windows and exterior-grade steel or fiberglass doors are common choices. Use polyurethane sealant or butyl tape around all penetrations to prevent leaks. Standard residential windows work, but you’ll need to build out the rough opening with lumber or steel to match the wall thickness after insulation.
Foundation options include pier and beam, concrete slab, or helical piers. Containers only need support at the four corners and optionally at the midpoint of each long side for 40-footers. Piers should be level within 1/4 inch across the length. If you’re in a flood zone or on a slope, piers or helical anchors are your best bet. If you’re setting on a slab, the container can sit directly on it, but use a moisture barrier (6-mil poly or peel-and-stick membrane) under the container floor to prevent condensation.
Insulation, Climate Control, and Utilities
Spray foam insulation is the go-to for containers. Use closed-cell spray foam (2–3″ thick) on all walls, ceiling, and underside of the floor if accessible. Closed-cell foam provides an R-value of about 6–7 per inch, acts as a vapor barrier, and stops condensation, critical in a steel box. Budget $2,500–$4,500 for a 20-foot container, more for 40-footers.
Alternatively, you can frame out 2×2″ or 2×3″ studs along the interior walls and use rigid foam board or mineral wool batts, but you’ll need a separate vapor barrier (6-mil poly) on the warm side of the insulation. Spray foam is faster, more effective, and eliminates air gaps.
For climate control, a mini-split heat pump (9,000–12,000 BTU) handles both heating and cooling efficiently in spaces under 400 square feet. Mount the indoor head unit high on a wall, run the refrigerant lines and condensate drain through a small exterior penetration, and set the outdoor compressor on a concrete pad. These systems run on 240V and require a dedicated 15- or 20-amp circuit.
Electrical and plumbing require planning. Run Romex or conduit along the interior walls before closing them in with drywall or paneling. You’ll typically want:
- A 100-amp or 125-amp main panel
- Dedicated 20-amp circuits for kitchen countertop outlets (per NEC 210.52)
- A dedicated circuit for the mini-split
- GFCI-protected outlets in kitchen and bath
For plumbing, use PEX tubing for supply lines (easier to route than rigid copper) and PVC or ABS for drains. If you’re connecting to municipal sewer, slope your drain lines at 1/4″ per foot minimum. If you’re on a septic system or using a composting toilet, your plumbing is simpler, just greywater drains for sinks and shower.
Builders incorporating accessible design features should plan wider doorways (36″ clear) and consider a curbless shower with grab bars.
Costs and Budgeting for a Container Tiny House
Here’s a realistic breakdown for a 20-foot container tiny house, DIY-heavy build, in 2026 dollars:
- Container purchase: $2,000–$4,500 (WWT to one-trip)
- Delivery: $300–$1,200 (depends on distance and access)
- Foundation (pier and beam): $800–$2,500
- Insulation (spray foam): $2,500–$4,000
- Windows and doors: $600–$1,500 (2–3 windows, 1 exterior door)
- Framing and reinforcement (steel tubing, welding): $1,000–$2,500
- Electrical (panel, wiring, outlets, fixtures): $1,200–$2,500
- Plumbing (fixtures, PEX, drains): $800–$2,000
- HVAC (mini-split): $1,200–$2,000 (DIY install) or $2,500–$4,000 (pro install)
- Interior finishes (drywall or paneling, flooring, paint): $1,500–$3,000
- Kitchen and bath fixtures: $1,500–$4,000
Total DIY budget: $13,400–$30,200, depending on finishes and how much you subcontract.
If you hire a container home builder for a turnkey project, expect $60,000–$80,000 for a finished 20-footer, and $100,000–$150,000 for a 40-foot high-cube with higher-end finishes.
Permit costs vary wildly by jurisdiction. Some rural counties allow container homes as accessory structures with minimal permitting (under $500). Urban areas or places with strict zoning may require engineered plans, energy code compliance (Title 24 in California, for example), and inspections at multiple stages, adding $2,000–$5,000 to your budget. Always check local codes before buying a container.
Transportation and site access can be a hidden cost. A 40-foot container on a truck is about 45 feet long overall. If your site has a narrow driveway, tight turn radius, or overhead obstacles (tree branches, power lines), you may need a smaller delivery truck, a crane, or additional site prep, budget an extra $500–$2,000 if access is challenging.
Land and utilities aren’t included in these figures. If you’re parking your tiny house on raw land, add costs for well drilling, septic install, or utility hookups. Municipal water and sewer connections can run $3,000–$10,000 depending on distance from the main line.
Finally, consider resale and financing. Most traditional lenders won’t finance a shipping container home unless it’s on a permanent foundation and meets local building codes. You may need a personal loan, construction loan, or cash. Resale values are still emerging, but well-built container homes in desirable locations have sold for $80–$150 per square foot, in line with other tiny homes. Design trends featured on small-space living platforms show growing interest, which could support future resale values.
Container tiny houses aren’t a magic bullet, but they’re a viable, cost-effective path to homeownership, especially if you’re handy, patient, and willing to navigate zoning and permitting. With smart planning, quality insulation, and attention to detail, a shipping container can become a comfortable, durable home that lasts decades.